Hey there, friends! I’m the digital marketer behind many projects, and for the last six years, Canva’s been my go-to buddy for creating awesome visuals that make my projects pop. Can you believe even folks who barely know Canva or Canva Pro are raving about it online? That’s how amazing this tool is! Whether social media posts or branded goodies, Canva’s been by my side and is growing with me.
Let me take you through my story—how I started with Canva’s Free plan, fell head over heels for its ease, and upgraded to Canva Pro for its super-cool AI tools. I’ll share all about Canva’s features, and how I use them, and break down the Free and Pro plans to help you pick what’s perfect for your marketing adventures.
Falling for Canva’s Free Plan

Six years back, I was a newbie digital marketer, hustling for clients with a tiny budget. I needed a way to whip up pro-looking visuals without wrestling with Photoshop or paying for a designer. That’s when I found Canva’s Free plan—oh, what a game-changer! Its drag-and-drop setup was so easy, and the free templates had my work looking sharp right away.
I leaned hard on Canva’s 2.1 million free templates for everything from Instagram posts to blog graphics. I’d scroll through the library, grab a design, and tweak colours to match my client’s style. The drag-and-drop editor was like magic, letting me move text and images with a smile. Plus, free fonts and stock photos gave my designs that extra sparkle.
One project I’ll never forget was making a flyer for a local bakery. I snagged some drool-worthy cupcake pics from Canva’s free stock library, added fun text, and saved it as a PDF. The bakery got a flood of customers, and I was thrilled—Canva helped me shine without spending a penny! But as my projects piled up, I bumped into the Free plan’s limits. Premium templates were off-limits, and 5GB of storage got cramped with my designs.
Canva’s AI tools also caught my eye back then, like Magic Write (25 lifetime uses) for quick captions and Magic Design (10 lifetime uses) for templates. I used Magic Write to whip up a catchy slogan for a gym ad, and it was like having a writing pal. But those AI uses ran out fast, leaving me wanting more.
Stepping Up: Why I Went Pro
About three years in, my work got super busy. I was handling big campaigns, teaming up with clients, and needing every visual to scream “on-brand.” The Free plan was awesome for starting, but it wasn’t enough anymore. So, I jumped to Canva Pro ($119.99/year), and wow, it’s been a total game-changer!
With Pro, I got access to 3.8 million templates, including fancy premium ones that made my work look next-level. I could use premium stock photos, graphics, and icons without paying extra—goodbye, $1 per asset! The 1TB storage was a lifesaver, holding all my videos and design archives. But the real star? Canva’s Magic Studio AI tools and the Brand Kit.
One project that blew me away was building a pitch deck for a sustainable fashion brand. I used the Brand Kit to pop in their logo, earthy colours, and custom fonts, keeping every slide perfectly on-brand. Magic Design churned out gorgeous slide templates when I typed “Modern eco-conscious presentation,” and Magic Write gave me 250 snappy titles and descriptions a month. With Magic Switch, I turned that deck into Instagram stories and a one-pager for investors in no time. The client scored a big partnership, and I saved hours—talk about a win!
Pro’s AI tools, with unlimited uses (or 250/month for Magic Write), are my secret sauce. For a recent online store campaign, I used Magic Media to make a product video from a text prompt, added Magic Animate for slick transitions, and used Magic Eraser to tidy up product pics. It’s like having a whole design crew cheering me on!
Canva’s Features Are Awesome: How to Use Them
Let’s dive into Canva’s core features, what they do, and how I’ve used them—from my Free plan days to my Pro-powered projects today.
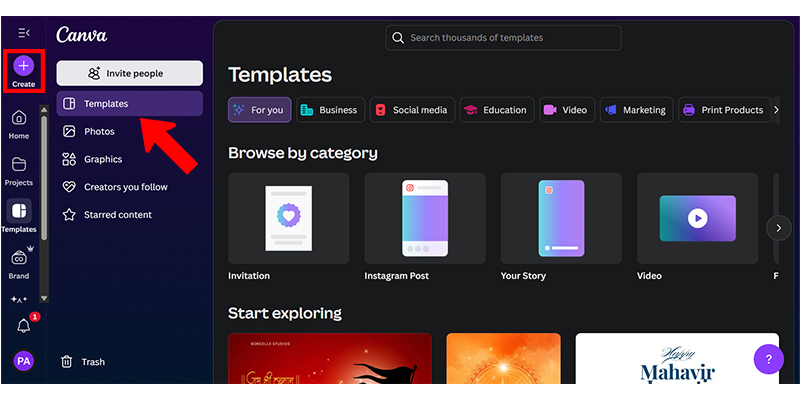
1. Templates
What They Are: Ready-made designs for social media, presentations, and more. Free has 2.1 million; Pro gives you 3.8 million (free + premium).
Features:
How I Use Them:
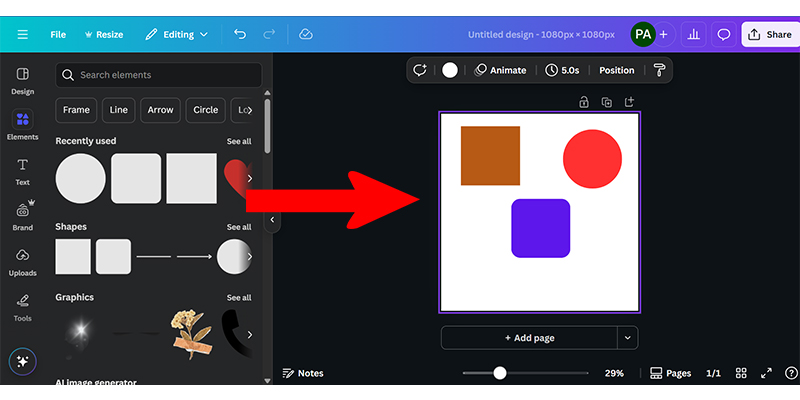
2. Drag-and-Drop Editor
What It Is: Canva’s super-friendly setup for moving design pieces around.
Features:
How I Use It:
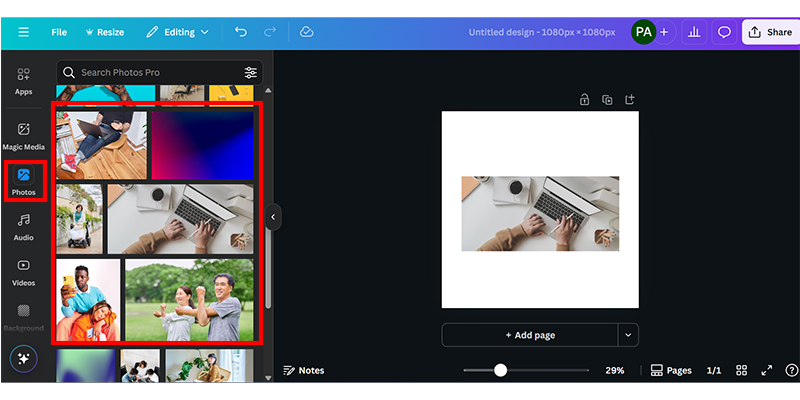
3. Stock Library (Photos, Graphics, Icons)
What It Is: Tons of visuals. Free has free assets; Pro adds premium ones.
Features:
How I Use It:
4. Text and Fonts
What It Is: Loads of fonts and text effects. Free has basic ones; Pro adds premium and custom uploads.
Features:
How I Use It:
5. Video and Animation Tools
What It Is: Tools for videos, GIFS, and animations. Free has basics; Pro has premium extras.
Features:
How I Use It:

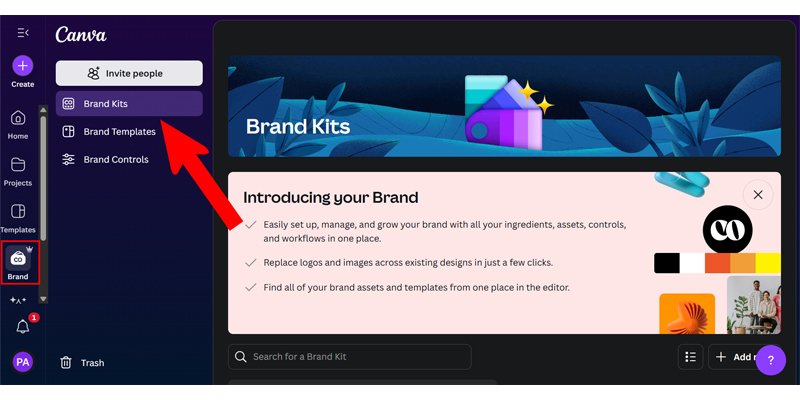
6. Brand Kit
What It Is: Stores logos, fonts, and colours for branding (Pro only).
Features:
How I Use It:
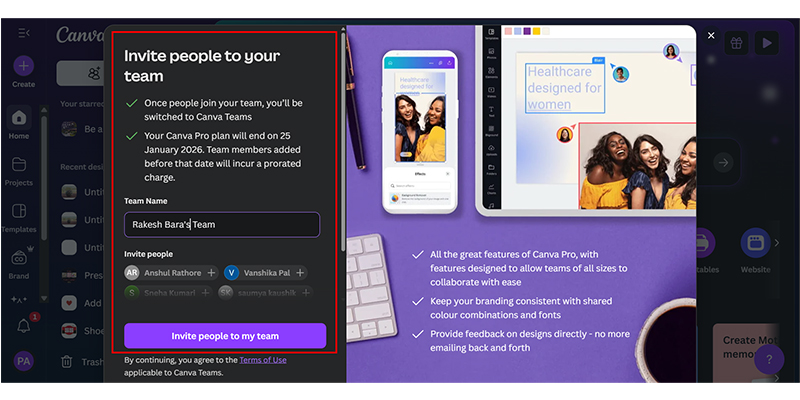
7. Collaboration Tools
What It Is: Features for team design fun. Free has basic sharing; Pro has more control.
Features:
How I Use It:
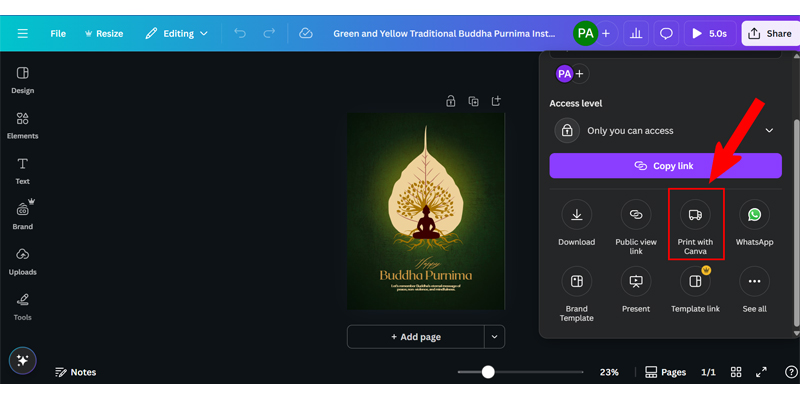
8. Printing and Merchandise
What It Is: Design and print stuff like posters or mugs. Both plans print; Pro gives discounts.
Features:
How I Use It:
9. Magic Studio (AI Tools)
Canva’s AI tools are my best pals! Here’s how I use them and the Free vs. Pro scoop:
- Magic Design (AI templates):
- Free: 10 lifetime uses, free templates. I made quick blog graphics.
- Pro: Unlimited uses, premium templates. I whip up ad campaigns in a snap.
- How-To: Pick “Magic Design,” type a prompt, and choose a template.
- Story: For a travel client, I used Magic Design to make a bright poster with a “Tropical vacation ad”—saved me hours!
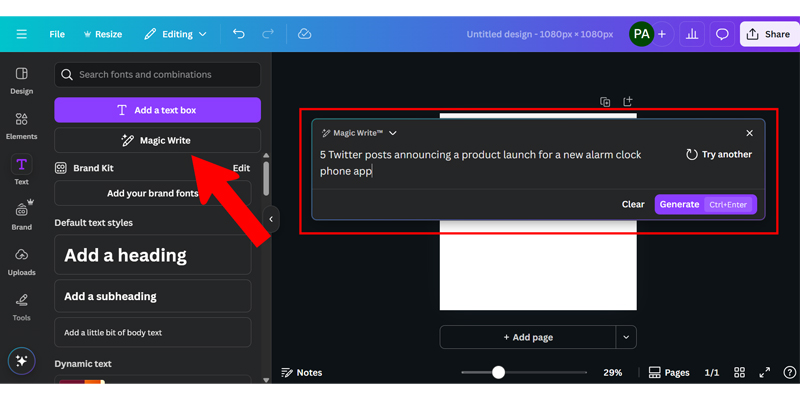
- Magic Write (AI text):
- Free: 25 lifetime uses. I wrote captions until they ran out.
- Pro: 250/month. I create blog outlines and ad copy every day.
- How-To: Click “+,” pick “Magic Write,” and add a prompt.
- Story: For a gym campaign, Magic Write gave me “Get Fit in 30 Days!” in a flash.
- Magic Media (Text to Image/Video):
- Free: 5-10 uses, basic styles. I tried it for simple graphics.
- Pro: Unlimited, premium styles. I make Reel videos for campaigns.
- How-To: Go to “Apps,” pick “Magic Media,” and enter a prompt.
- Story: I created a cool product video for a tech client with a “Sci-fi gadget ad.”
- Magic Edit (Edit images):
- Free: 5-10 uses. I added small bits to the photos.
- Pro: Unlimited. I swap backgrounds for online store visuals.
- How-To: Upload an image, click “Edit Photo,” pick “Magic Edit,” brush the area, and add a prompt.
- Story: I added a coffee mug to a café scene for a cosy ad feel.
- Magic Eraser (Remove objects/backgrounds):
- Free: 5-10 uses, simple images. I removed a stray item from a shoot.
- Pro: Unlimited, complex images. I cleaned up product pics for a store.
- How-To: Upload an image, click “Edit Photo,” pick “Magic Eraser,” and brush over the object.
- Story: I cleared messy backgrounds from jewellery photos for a sleek look.
- Magic Morph (Transform shapes/textures):
- Free: 5 uses, basic changes. I tested it on shapes.
- Pro: Unlimited, premium textures. I made a shape into a marble banner for a luxe brand.
- How-To: Select an element, go to “Apps,” pick “Magic Morph,” and add a prompt.
- Story: I gave an infographic a shiny metallic look for a client’s report.
- Magic Switch (Resize/repurpose designs):
- Free: 5 uses, basic switches. I turned a post into a story.
- Pro: Unlimited, advanced formats, translations. I made a post into a flyer and translated it.
- How-To: Open a design, click “Resize & Magic Switch,” and pick a format.
- Story: I turned a LinkedIn post into a flyer for a client’s event.
- Magic Animate (AI animations):
- Free: 5 uses, basic styles. I added a fade to a story.
- Pro: Unlimited, premium animations. I made TikTok ads with bouncy text.
- How-To: Select an object, click “Animate,” and pick “Magic Animate,” tweak settings.
- Story: I made workout tips “pop” in a fitness video ad.
- Background Remover:
- Free: 5-10 uses, simple images. I isolated a product for a mockup.
- Pro: Unlimited, complex subjects. I removed backgrounds from detailed shots.
- How-To: Upload an image, click “Edit Photo,” and pick “Background Remover.”
- Story: I made clean product mockups for an online shop.
- Translate (AI text translation):
- Free: Not available.
- Pro: Unlimited translations. I localised a campaign into Spanish and Japanese.
- How-To: Select text, go to “Apps,” pick “Translate,” and choose a language.
- Story: I translated posters for a travel client’s global fans.
Key Difference: Free’s 5-25 lifetime AI uses are fun to try, but run out quickly. Pro’s unlimited (or 250/month for Magic Write) AI tools make my work faster and more creative.
Free vs. Pro: What I’ve Learned
Here’s the lowdown on Free and Pro, based on my six years with Canva:
| Feature | Canva Free | Canva Pro |
| Templates | Advanced permissions and team templates. Approvals are easy. | 3.8M free + premium. Fancy designs save the day. |
| Stock Library | Free assets only. I paid $1 for premium icons sometimes. | Free + premium assets (unlimited). Awesome visuals, no extra cost. |
| Fonts | Free fonts, no custom uploads. A bit basic. | Free + premium fonts, custom uploads. Branding’s a breeze. |
| AI Tools (Magic Studio) | 5-25 lifetime uses. Gone too soon! | Unlimited or 250/month (Magic Write). My workflow’s so smooth. |
| Brand Kit | Not available. Manual branding was a hassle. | Full Brand Kit. One-click branding is magic. |
| Collaboration | Basic sharing, no permissions. Feedback was tricky. | Advanced permissions, and team templates. Approvals are easy. |
| Storage | 5GB. It is full of videos. | 1TB. Room for everything! |
| Video/Animation | Basic editor, limited animations. Great for stories. | Premium editor, unlimited animations. TikTok ads rock. |
| Printing | Standard printing, no discounts. Good for small stuff. | Discounted printing, AI tips. Merch is budget-friendly. |
| Export Options | Basic (PNG, JPG, PDF). Fine for social. | Premium (4K, transparent, CMYK). Pro-level deliverables. |
| Support | Advanced permissions and team templates. Approvals are easy. | Priority support, cool resources. Help’s super-fast. |
Why I Love Pro Today
The Free plan got me started, but Pro’s my happy place now. For a recent wellness campaign, I used Magic Design for stunning Instagram templates, Magic Write for 250 captions, and Magic Switch to turn designs into Pinterest pins and emails. The Brand Kit kept everything cohesive, and 1TB of storage held all my files. The campaign boosted engagement by 25%, and I saved tons of time—Pro’s worth every cent!
As a digital marketer, Canva Pro makes my life easier, sparks my creativity, and delivers pro-quality visuals. Its unlimited AI tools are like having a design and writing team cheering me on. The Free plan is still great for small projects, but for big campaigns, the Pro is my best friend.
Tips for Fellow Marketers
Wrapping Up
Canva’s been my creative pal for six years, from my Free plan beginnings to my Pro-powered projects. The Free plan showed me what’s possible, but Pro’s unlimited AI tools, premium assets, and Brand Kit have taken my campaigns to new heights. Whether you’re just starting or a marketing pro, Canva’s got something for you. For me, Pro’s the key to making awesome, on-brand visuals that get results.
Wanna kick your marketing up a notch? Give Canva’s Free plan a whirl or go all-in with Pro at Canva’s website. Drop your favourite Canva feature in the comments, and let’s chat about more marketing tips on Toolzbytes!
Disclaimer: This post is all about my experience and isn’t tied to Canva. Prices and features can change—peek at Canva’s pricing page for the latest scoop.